> ## Documentation Index
> Fetch the complete documentation index at: https://docs.sleekchat.ai/llms.txt
> Use this file to discover all available pages before exploring further.
# Setup Open WebUI
> Learn how to set up Open WebUI for seamless integration and usage.
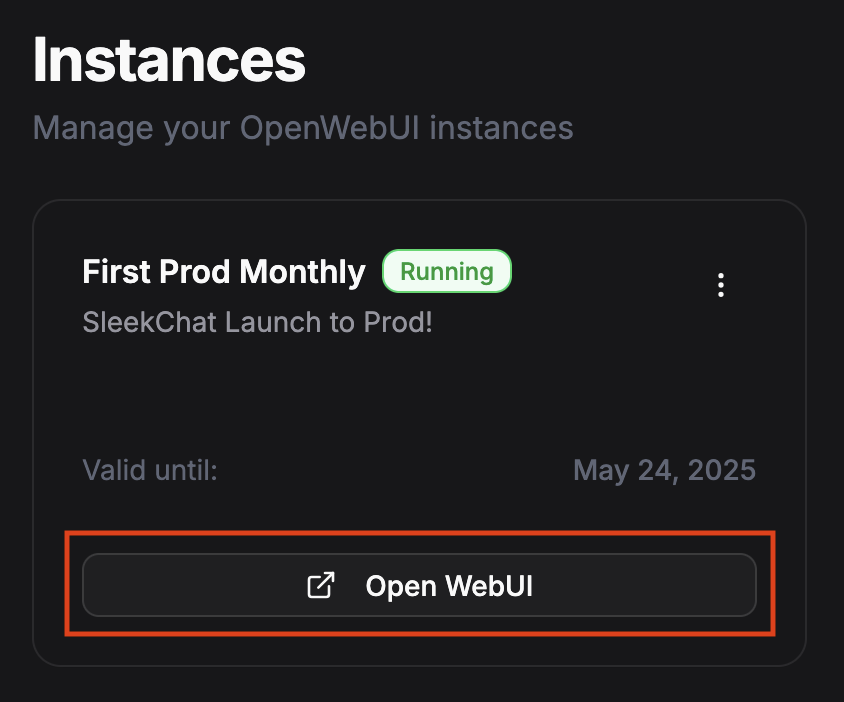
## Your Open WebUI Instance
You can always access your created Open WebUI instances from the link below:
[https://sleekchat.ai/instances](https://sleekchat.ai/instances)
 ## Sign Up Your Admin Account
Now that you have clicked on the `Open WebUI` button, you will be taken to the Open WebUI instance. You will see a screen like below:
## Sign Up Your Admin Account
Now that you have clicked on the `Open WebUI` button, you will be taken to the Open WebUI instance. You will see a screen like below:
 Next, a form for you to sign up as the admin of your Open WebUI instance will be displayed.
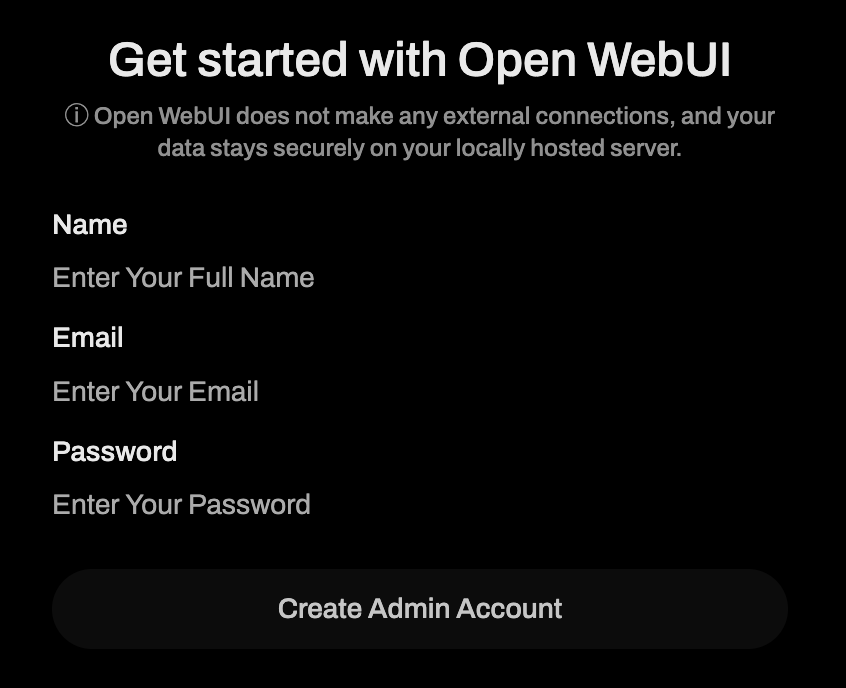 The first user you registered will always be the Admin account.
## Chat Interface
Congrats! You have now successfully created your first user in Open WebUI. You will be taken to the chat interface.
The first user you registered will always be the Admin account.
## Chat Interface
Congrats! You have now successfully created your first user in Open WebUI. You will be taken to the chat interface.
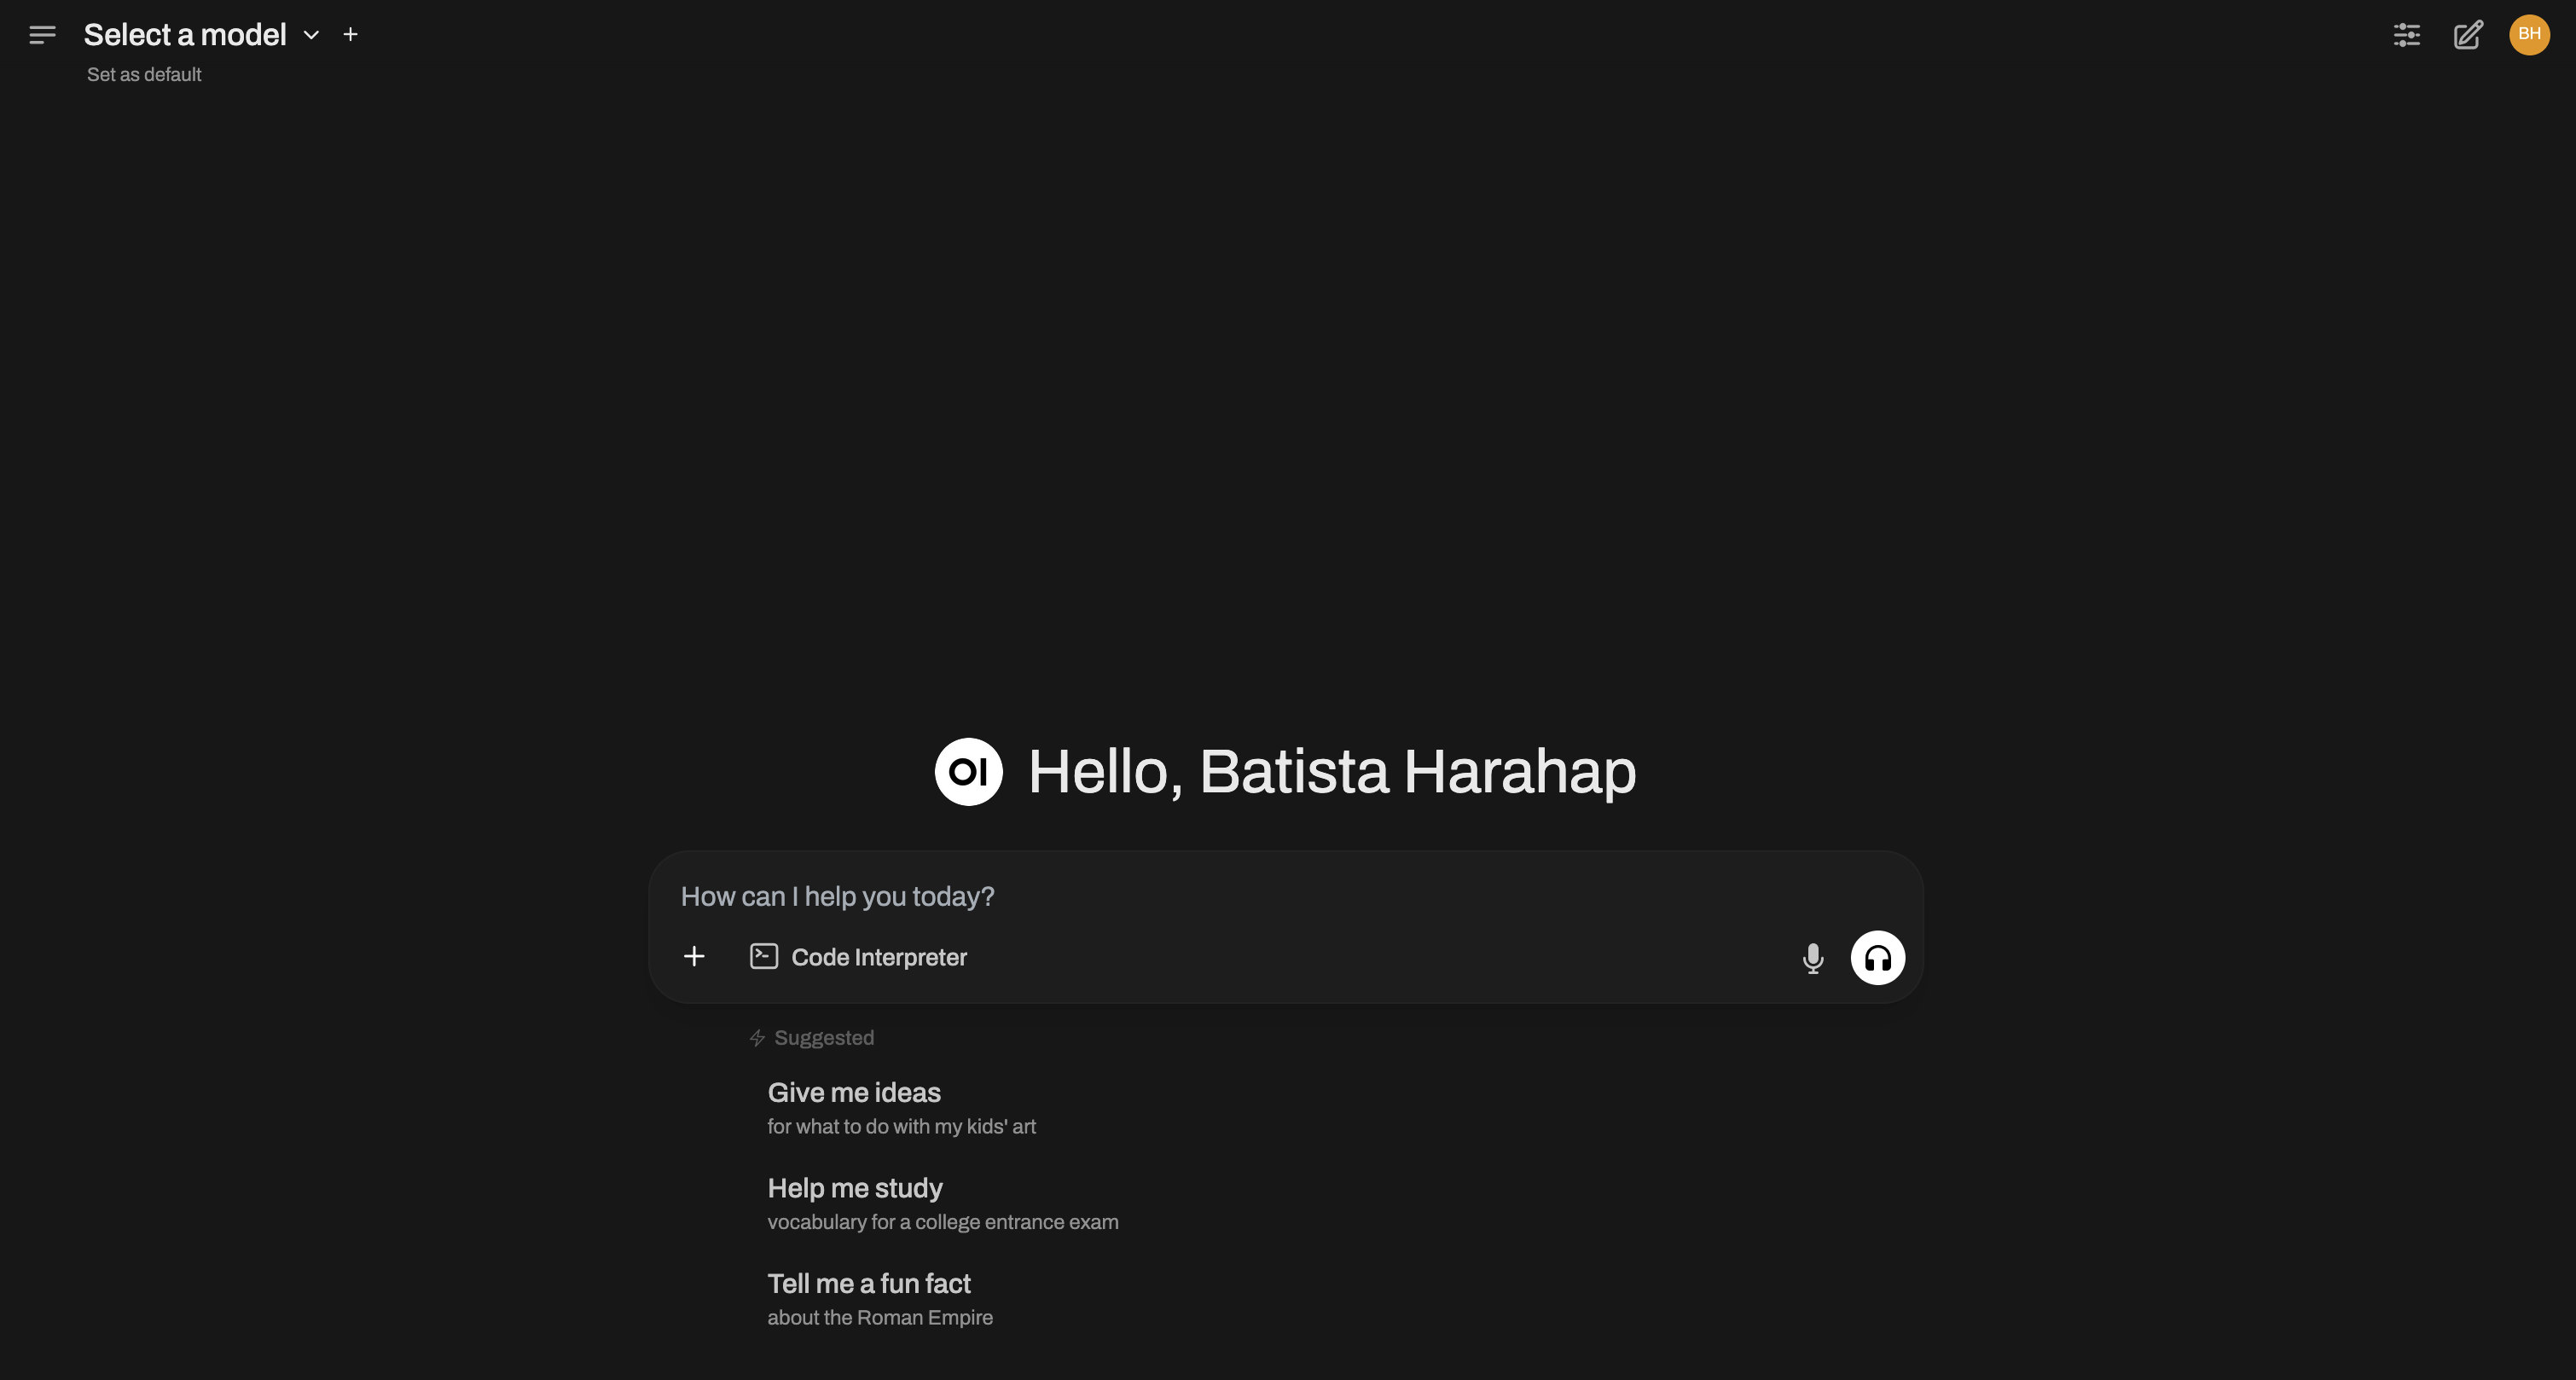 It's still looks empty right? That's because we haven't set up the API keys yet. Let's do that now.
## Setting Up Your OpenAI API Key
Do you remember the steps we took to create our own API key? Now is the time to use it!
It's still looks empty right? That's because we haven't set up the API keys yet. Let's do that now.
## Setting Up Your OpenAI API Key
Do you remember the steps we took to create our own API key? Now is the time to use it!
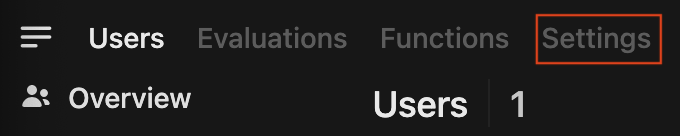
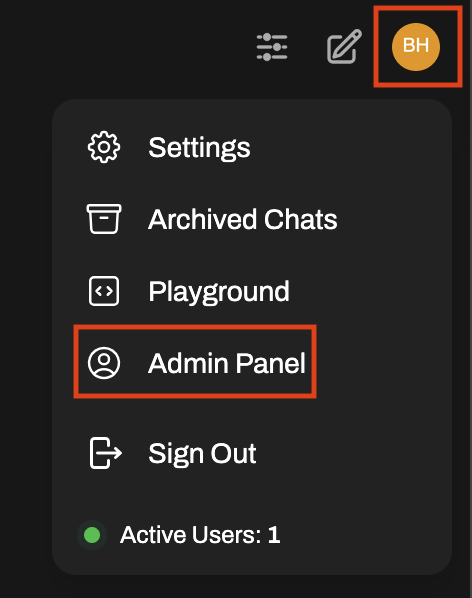 ### Registered Users
The next page by default will show you a list of the currently registered users, you. You can use this part of the Settings page to add/remove users as you like. For the purpose of this guide, we're not going to do that now. Instead click on the `Settings` tab on the left part of the top navigation tabs.
### Registered Users
The next page by default will show you a list of the currently registered users, you. You can use this part of the Settings page to add/remove users as you like. For the purpose of this guide, we're not going to do that now. Instead click on the `Settings` tab on the left part of the top navigation tabs.
 ### General
You will be taken to the `General` section of the Admin Settings page. In here you can set up how new users are created. For the sake of security, the tip below will take you far.
We recommend to set the `Enable New Sign Ups` option to be disabled. Don't forget to click on the `Save` button on the bottom right corner.
### Connections
### General
You will be taken to the `General` section of the Admin Settings page. In here you can set up how new users are created. For the sake of security, the tip below will take you far.
We recommend to set the `Enable New Sign Ups` option to be disabled. Don't forget to click on the `Save` button on the bottom right corner.
### Connections
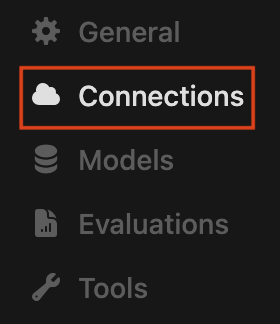 This will take you to the `Connections` section of the Admin Settings page. In here you can set up the OpenAI API key.
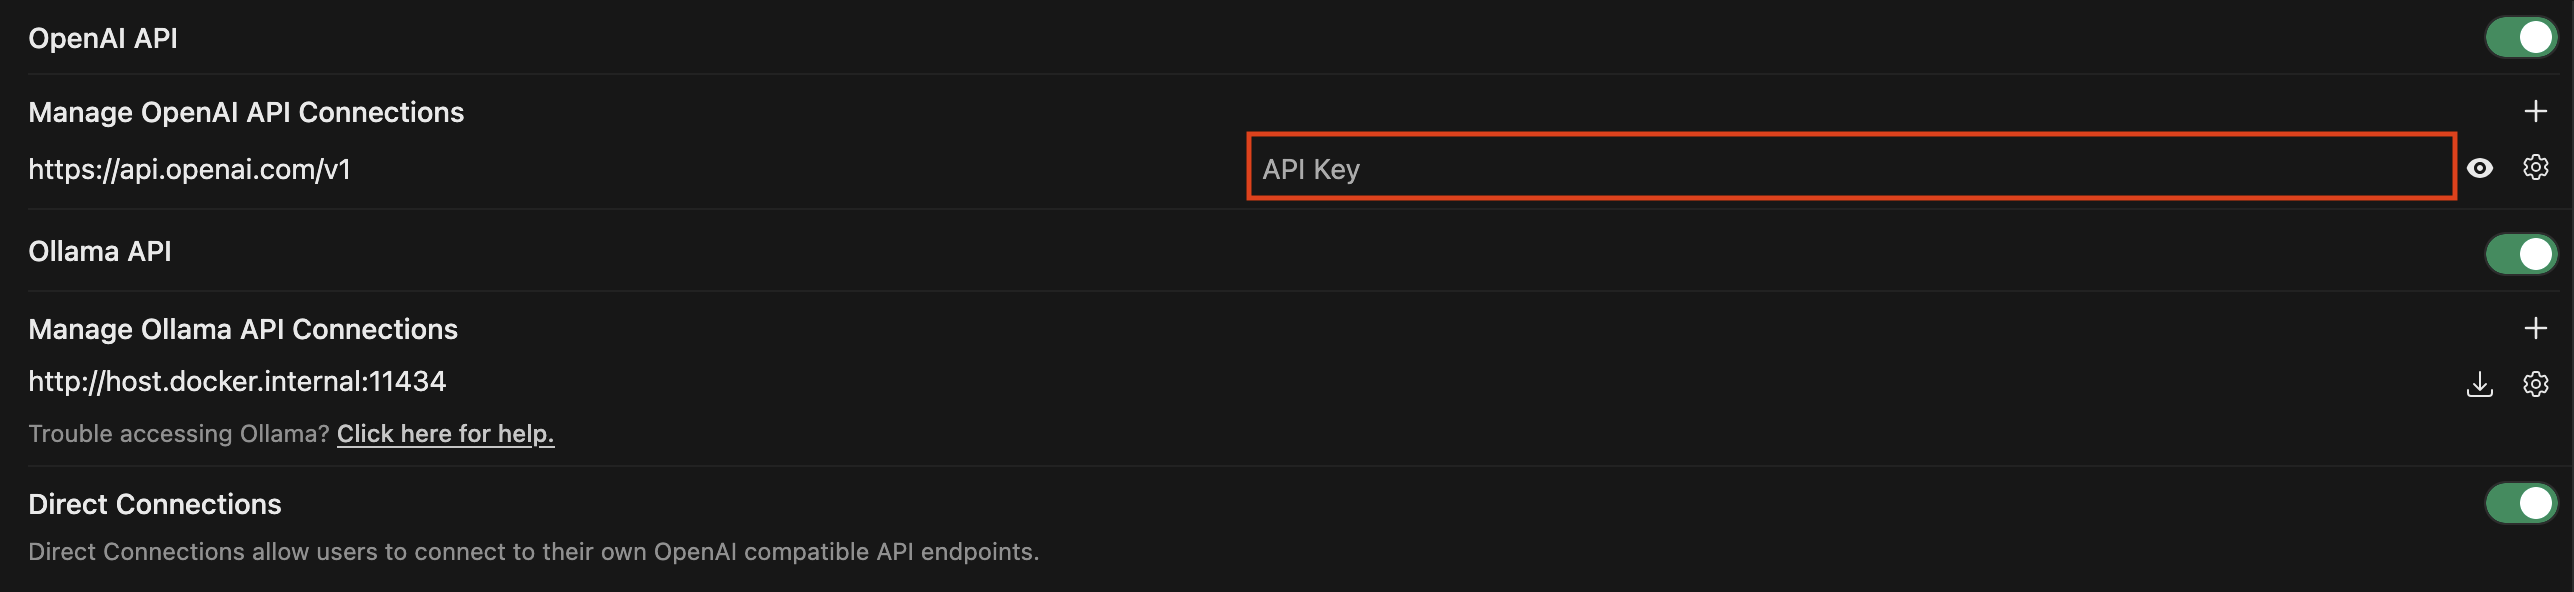 Paste your OpenAI API key into the area marked with the red rectangle.
Click on the `Save` button on the bottom right corner.
Now your Open WebUI instance is fully setup for text based conversations. You can now start chatting with an AI model or you can follow along to set up image generation and other features.
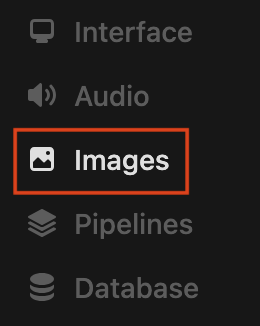
### Image Generation
Paste your OpenAI API key into the area marked with the red rectangle.
Click on the `Save` button on the bottom right corner.
Now your Open WebUI instance is fully setup for text based conversations. You can now start chatting with an AI model or you can follow along to set up image generation and other features.
### Image Generation
 OpenAI has models that can generate images from text prompts. You can use your OpenAI API key to access these models and generate images.
 Enable image generation by clicking on the checkbox marked with the red rectangle.
Paste your OpenAI API key into the area marked with the red rectangle.
On the `Set Default Model` field, you can choose between `gpt-image-1` (flagship model), `dall-e-3` or `dall-e-2`.
On the `Set Image Size` field, depending on the model you choose, the sizes will vary. To start with, type in `1024x1024`.
Leave the `Set Steps` field as it is. The more steps you add, the better the results will be but the more expensive it will be.
Click on the `Save` button on the bottom right corner.
#### Model Cards
For your benefit, here are the model cards for all of OpenAI's image models:
1. [GPT Image 1](https://platform.openai.com/docs/models/gpt-image-1)
2. [Dall E 3](https://platform.openai.com/docs/models/dall-e-3)
3. [Dall E 2](https://platform.openai.com/docs/models/dall-e-2)
### Audio Generation
Enable image generation by clicking on the checkbox marked with the red rectangle.
Paste your OpenAI API key into the area marked with the red rectangle.
On the `Set Default Model` field, you can choose between `gpt-image-1` (flagship model), `dall-e-3` or `dall-e-2`.
On the `Set Image Size` field, depending on the model you choose, the sizes will vary. To start with, type in `1024x1024`.
Leave the `Set Steps` field as it is. The more steps you add, the better the results will be but the more expensive it will be.
Click on the `Save` button on the bottom right corner.
#### Model Cards
For your benefit, here are the model cards for all of OpenAI's image models:
1. [GPT Image 1](https://platform.openai.com/docs/models/gpt-image-1)
2. [Dall E 3](https://platform.openai.com/docs/models/dall-e-3)
3. [Dall E 2](https://platform.openai.com/docs/models/dall-e-2)
### Audio Generation
 OpenAI can help you do Speech To Text and Text To Speech. You can use your OpenAI API key to access these models and generate audio from text or generate text from audio.
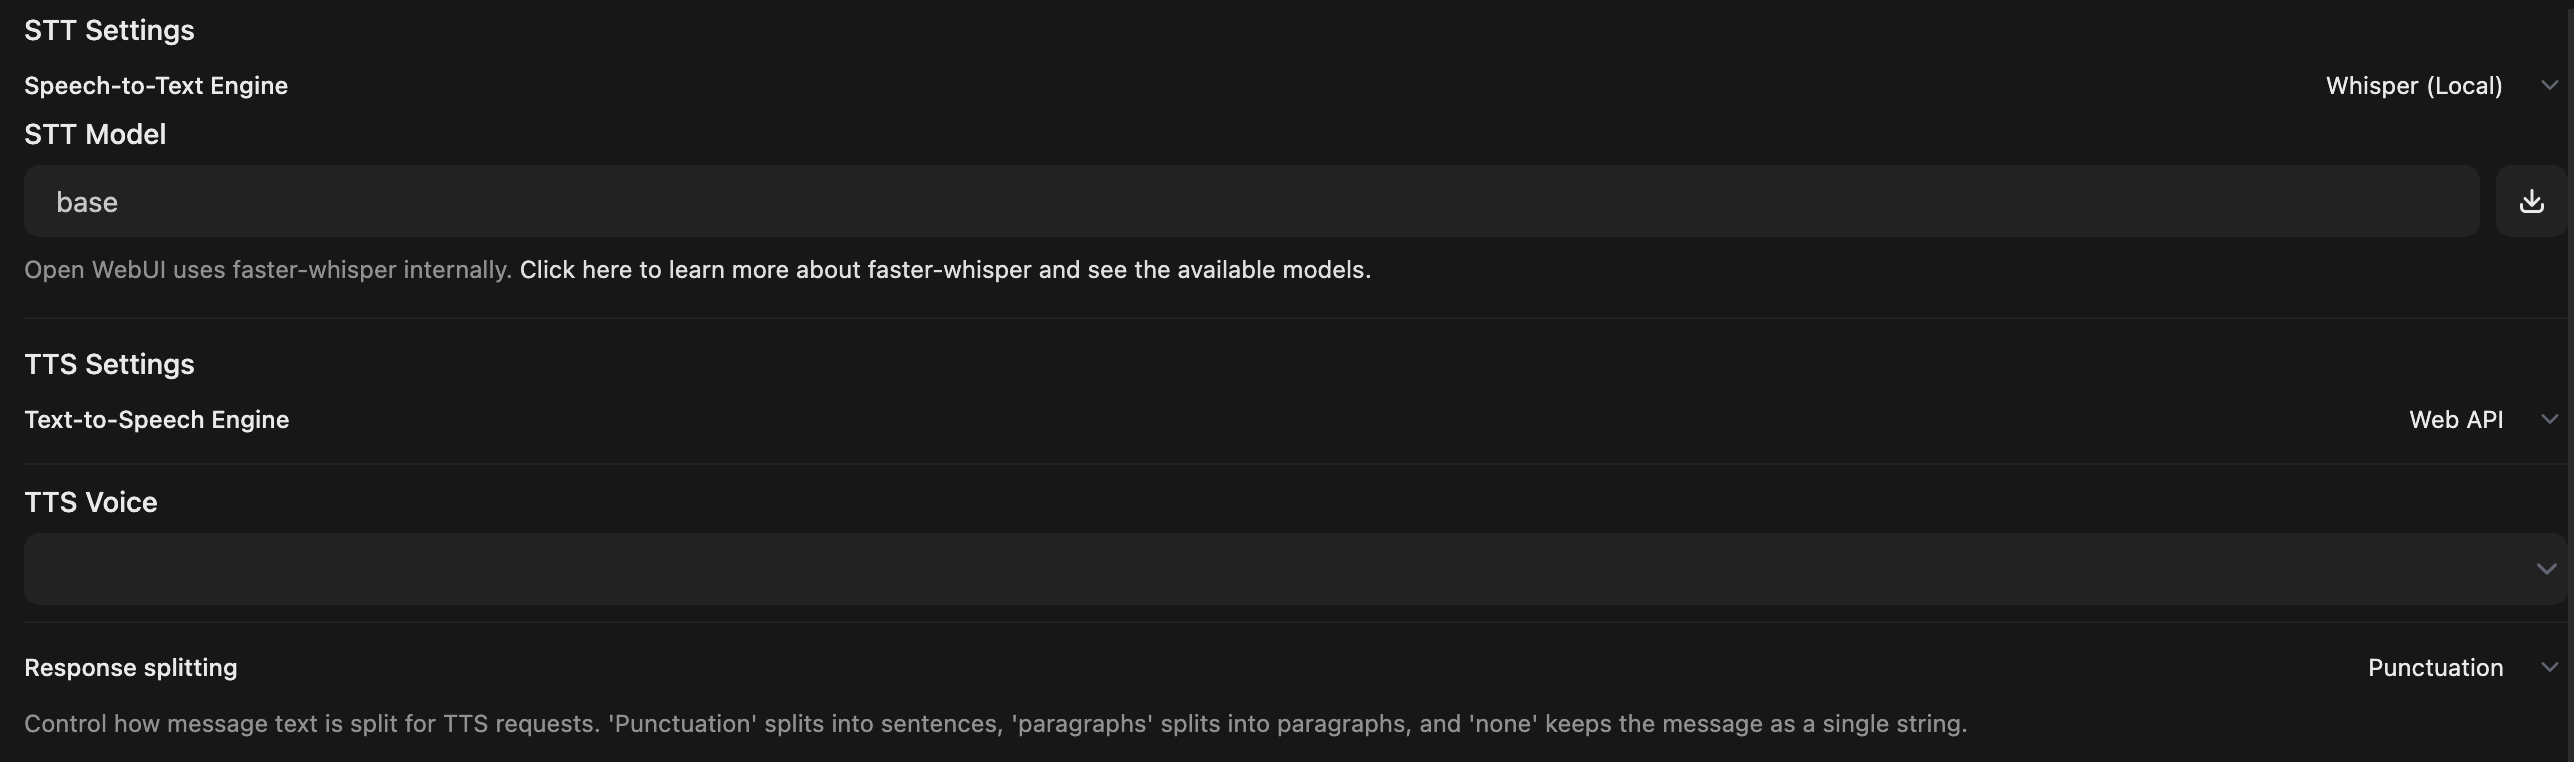 As we follow the steps below, the Audio settings page will change its look to suit our needs.
Change the `Speech-to-Text Engine` to `OpenAI` to display the OpenAI API key field.
Paste your OpenAI API key into the newly displayed field.
In the `STT Model` field, type in `whisper-1` to use OpenAI's Whisper model. Available models are `whisper-1`, `gpt-4o-mini-transcribe` and `gpt-4o-transcribe`.
Change the `Text-to-Speech Engine` to `OpenAI` to display the OpenAI API key field.
Paste your OpenAI API key into the newly displayed field.
Click on the `Save` button on the bottom right corner.
Feel free to play around with the other settings. You can change the voice and the model as you like.
#### Model Cards
For your benefit, here are the model cards for all of OpenAI's TTS models:
1. [GPT-4o mini TTS](https://platform.openai.com/docs/models/gpt-4o-mini-tts)
2. [TTS-1](https://platform.openai.com/docs/models/tts-1)
3. [TTS-1 HD](https://platform.openai.com/docs/models/tts-1-hd)
And here are the model cards for all of OpenAI's STT models:
1. [GPT-4o Transcribe](https://platform.openai.com/docs/models/gpt-4o-transcribe)
2. [GPT-4o mini Transcribe](https://platform.openai.com/docs/models/gpt-4o-mini-transcribe)
3. [Whisper](https://platform.openai.com/docs/models/whisper-1)
## Enabling Web Search
Yes, you can let the AI to Google for more context.
As we follow the steps below, the Audio settings page will change its look to suit our needs.
Change the `Speech-to-Text Engine` to `OpenAI` to display the OpenAI API key field.
Paste your OpenAI API key into the newly displayed field.
In the `STT Model` field, type in `whisper-1` to use OpenAI's Whisper model. Available models are `whisper-1`, `gpt-4o-mini-transcribe` and `gpt-4o-transcribe`.
Change the `Text-to-Speech Engine` to `OpenAI` to display the OpenAI API key field.
Paste your OpenAI API key into the newly displayed field.
Click on the `Save` button on the bottom right corner.
Feel free to play around with the other settings. You can change the voice and the model as you like.
#### Model Cards
For your benefit, here are the model cards for all of OpenAI's TTS models:
1. [GPT-4o mini TTS](https://platform.openai.com/docs/models/gpt-4o-mini-tts)
2. [TTS-1](https://platform.openai.com/docs/models/tts-1)
3. [TTS-1 HD](https://platform.openai.com/docs/models/tts-1-hd)
And here are the model cards for all of OpenAI's STT models:
1. [GPT-4o Transcribe](https://platform.openai.com/docs/models/gpt-4o-transcribe)
2. [GPT-4o mini Transcribe](https://platform.openai.com/docs/models/gpt-4o-mini-transcribe)
3. [Whisper](https://platform.openai.com/docs/models/whisper-1)
## Enabling Web Search
Yes, you can let the AI to Google for more context.
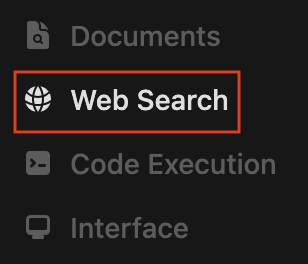 Turn on `Web Search`
In the `Web Search Engine`, from the drop down box, select `searxng`.
In the `Searxng Query URL`, SleekChat has already provided you a SearxNG instance, you can use that by entering `https://searxng.sleekchat.net`
Leave the other fields as they are unless you are feeling adventurous, it's fine.
Click on the `Save` button on the bottom right corner.
Turn on `Web Search`
In the `Web Search Engine`, from the drop down box, select `searxng`.
In the `Searxng Query URL`, SleekChat has already provided you a SearxNG instance, you can use that by entering `https://searxng.sleekchat.net`
Leave the other fields as they are unless you are feeling adventurous, it's fine.
Click on the `Save` button on the bottom right corner.
 If you start a new chat now, you will see a `Web Search` button on your text input field. Click on that to let the AI search the web for more context.